Alt is the abbreviation of the word "Alter", which means "change" in Chinese. Under the WINDOWS operating platform, the Alt key is the king of the keyboard. Skillful use of this key can greatly improve the efficiency of our computer operation. In PHOTOSHOP, its function is more vivid.
The related skills provided by the Internet are mostly listed, and it is not easy to remember because they are not connected to each other. This article tries to roughly categorize them according to their principle of operation. Some functions are not very commonly used. Just to keep the article complete, it is easy to try and stop. In addition, Alt needs to hold down the mouse when working with the menu, and then release it when you press the desired command.
First, perform the copy function
1. Press Alt when using the move tool to drag the layer to copy the layer, resulting in a new layer named after layer × copy; if the object in the selection area is moved, it will be copied inside the layer, not Create a new layer; this function is also suitable for the coordination of mobile tools and keypad arrow keys;
2. Hold down the Alt key (Ctrl + Alt + T) during the free transform (Ctrl + T), that is, copy the original layer first and then transform on the copied layer; in the same way, if the objects in the transformation selection area are in this picture The copy transformation is performed inside the layer, and no new layer is generated; it should be noted that this move is only visible when the free transformation box is activated, and no subsequent operation is performed. Only when the transformation starts can the copy be found;
In addition, Ctrl + Shift + T is to perform the last transformation again, and Ctrl + Alt + Shift + T is to copy the original image and then perform the last transformation. This command is widely used when making a combination of recursive changes;
3. It is known that merging downward layers (Ctrl + E) is to merge the current layer with the next visible layer, and the latter is the layer name (if the layer below it is not visible, this command is not available); then Ctrl The result of + Alt + E is to copy the content of the current layer to the next layer; hold down the Alt key (Ctrl + Alt + Shift + E) to merge all visible layers when merging the visible layers (Ctrl + Shift + E) Make a copy and merge into the current layer (such as the empty layer built at the top).
Second, perform another choice when there is a possibility of choosing one of the two
1. When you hold down the Alt key, the pipette tool will draw the background color instead of the foreground color;
2. The magnifying glass tool becomes a zoom-out tool when you hold down the Alt key; in the same way, you can also blur and sharpen (R), lighten and darken (O), eraser and history eraser in the lasso and polygonal lasso (L) Switch between wipe (E);
3. When adding a layer mask, the default mask is all white, that is, the opacity is 100%. With Alt, click to add a mask, then add a black mask, that is, the layer is completely transparent;
4. When editing the layer mask, click the mask part in the layer panel with Alt to make the image window display the mask view, click again to restore to the layer view (hold SHIFT to switch off and on the mask );
5. Hold down the Alt key while dragging the auxiliary line to switch between the horizontal auxiliary line and the vertical auxiliary line. Hold Alt and click on an existing vertical guide to turn it into a horizontal guide, and vice versa.
3. Call the parameters of the last dialog operation
1. To repeat the filter just used intact, you can use the key combination (Ctrl + F) to call it. If you want to modify the previous filter parameters (if the filter has parameters), use The key combination (Ctrl + Alt + F) brings up the filter dialog box; if the filter does not have adjustable parameters, Alt is generally invalid (see below for special cases);
2. Use the same tools as above to adjust the color scale, hue, color balance, curve, etc. To repeat the previous parameters intact, you need to coordinate with Alt to call up the panel that retains the parameters and add a carriage return to confirm.
4. When it comes to dialog operation, force to avoid or append a dialog
1. Hold down the Alt key when creating a new layer in the layer panel to force a new layer property setting dialog to pop up;
2. Hold down the Alt key when deleting a layer in the layer panel to skip the confirmation dialog and delete the layer directly;
3. The above two are also valid for the channels and paths, actions, and historical record panels;
4. The effect described in Article 1 can be achieved with Ctrl + Shift + N, so Ctrl + Shift + Alt + N is equivalent to directly clicking the Create New Layer button in the Layers panel;
5. When the background layer is converted to a normal layer, the method is generally to double-click on the background layer of the layer panel, and a dialog box that converts to the layer 0 by default is displayed; with Alt double-click, you can skip the dialog box and directly convert the background layer to Layer 0;
Five, special usage
1. When grouping layers, hold down Alt to move the cursor to the boundary between the two layers, the cursor changes to a number, and click grouping;
2. When the current tools are brush (B) and gradient (G), press Alt to temporarily activate the eyedropper tool to draw the foreground color; this method is often used to replace the real eyedropper tool (I), because the hot keys of the first two are in the left hand Area, background color can be quickly switched and absorbed by hot key X;
3. In any dialog box with adjustable parameters, when you are not satisfied with the adjusted parameters, press Alt, then the button "Cancel" becomes "Reset", click to return to the initial state of the dialog box;
4. In text editing, Alt can cooperate with the left and right direction keys of the keyboard to fine-tune the character spacing;
5. Transferring channels: Taking RGB mode as an example, the hot keys Ctrl + ~, Ctrl + 1, Ctrl + 2, Ctrl + 3 correspond to displaying all channels and displaying red, green, and blue channels, respectively, and Ctrl + 4 corresponds to the back Alpha channel 1 and so on created in the display; with the Alt key (Ctrl + Alt + 4), these channels are directly transferred into the selection area;
6. Press the Alt key on the swatch panel, the cursor becomes scissors, and the swatch unit can be deleted.
6. Other usages
1. The fastest way to open files in PHOTOSHOP is to double-click on the desktop, Alt + double-click on the desktop to open (Shift + double-click on the desktop to bring up PHOTOSHOP's image browser);
2. The center of the range: when using a crop, rectangle or ellipse mask to define the range, the first point of the mouse click by default is a corner point of the rectangle or the outer rectangle of the oval; if it is matched with Alt, the first point It is the center of a rectangle or ellipse (with Shift, it forces a square or circle); it is also suitable for free transformation (with Shift is proportional scaling);
3. Perform subtraction: When using a mask or lasso, first delineate a selection, then press Alt to subtract the new selection from the original selection (Shift is to increase the selection), while pressing Shift and Alt at the same time The intersection of the new and old selections; this feature is also applied to the layer selection with the Ctrl key;
4. When the cloud filter is repeatedly executed, the cloud with the strongest contrast can be obtained with Alt, and the effect is equivalent to an ordinary cloud followed by an automatic gradation operation;
5. The Alt + Backspace and Ctrl + Backspace key combinations are foreground color and background color respectively. Another very useful hotkey is Shift + Backspace ?? to activate the filling dialog
In addition, the Alt + Shift + Backspace and Ctrl + Shift + Backspace key combinations only fill the existing pixels (to keep the transparent area) before the background color is filled; Ctrl + Alt + Backspace is the fill snapshot
6. Press Alt + "[" or Alt + "]" successively to activate (loop) the layer below or above as the current layer;
7. In the curve dialog box, hold down Alt and click the grid of the curve background to switch between 4 × 4 and 10 × 10;
8. Bring up the software egg: For example, press Alt and click the small triangle in the upper right of the layer panel, select the last item "Palette option, a small window of the magician will appear.
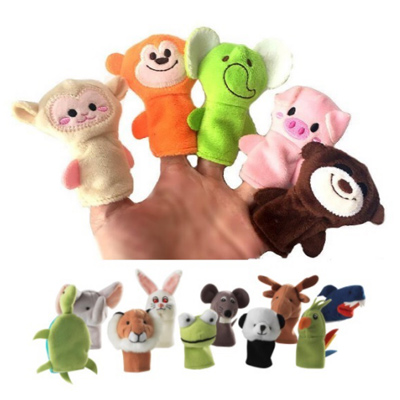
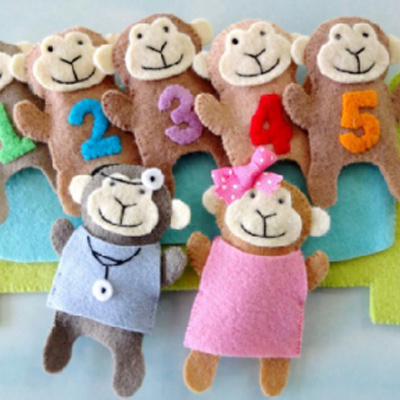
According to its volume, props are divided into big props and small props. The former includes tables and chairs, sofas, cabinets and screens, while the latter includes telephones, bottles, cups, food and gadgets. According to the use nature of props, it can also be divided into decorative props (such as curtains, screens, chandeliers and various decorations), hand props (such as bags, suitcases, pistols, canes, etc.), consumption props (such as food, cigarettes, bowls and plates that need to be broken in public on the stage), practical props (such as tables, chairs and other props that need to bear weight), etc. The design style of stage props is consistent with the style of setting, lighting and clothing. Therefore, in some modern stage designs with large deformation or abstraction, the form of props and props is also consistent with it. In some abstract scenes, the size of the props of the entity is even replaced by the actors'virtual actions. Plush toys can also be used as dance props. We can customize the finished products according to The Dance Props you imagine. We have professional designers, you can design according to your requirements, you only need to provide pictures (physical or graphic) can be customized. All production products can be labeled with cloth, embroidered with trademarks, so that each product has company information, has its own brand, enhance the visibility of the enterprise. Our products are exported to many countries, such as Japan, Europe and the United States. All raw materials are environmentally friendly.

Cloth introduction:

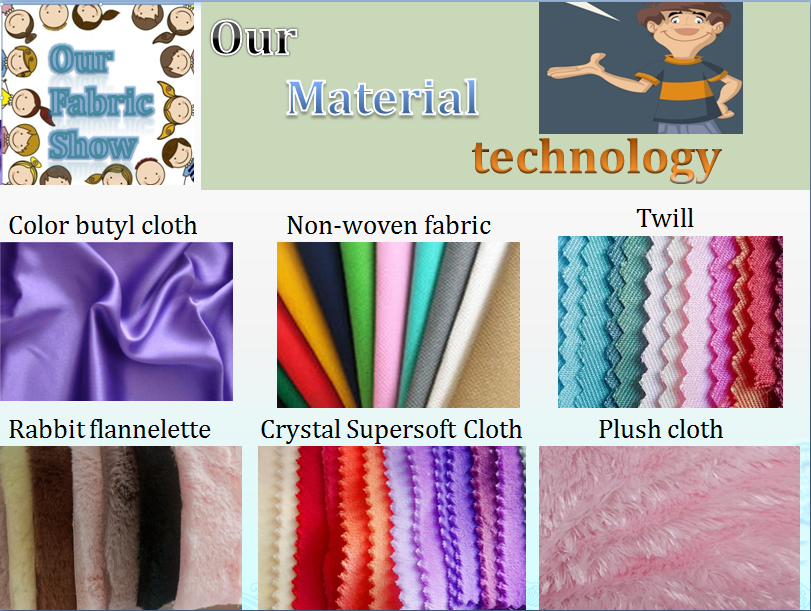
1.Yarn-dyed cloth: the structure of the silk thread is well shaped. The appearance is similar to 5 pieces of satin and 8 pieces of satin. The density is better than 5 pieces of satin and 8 pieces of satin. Specifications are generally 75 * 100D, 75 * 150D and so on. The raw material of tinted cloth: it can be cotton, blended or polyester, or pure chemical fiber, which is formed by the different organization of the fabric. The product that lubricious ding bu makes popularity is wide, glossiness drape feels good, feel soft. Elastic colored butyl cloth "adopts polyester FDY dayou light 50D*DTY75D+ spandex 40D as the raw material, and USES satin weave weave in the jet loom. Because the warp thread adopts dayou light silk, the cloth surface has charm, and occupies a place in the recent fabric market with the advantages of lightness, smoothness, elasticity, comfort and luster. Polyester low-elastic silk is the raw material, the fabric structure USES satin plain grain to change the texture, woven on the air jet loom, grey cloth and then after desizing, pre-shrinking, softness and other treatment, the fabric permeability is particularly good, and feel soft and smooth, fabric width is 150cm. Design and color d set comfort, modern sense, artistic sense in one of the new fabrics
2. Non-woven fabrics: They are directional or random fibers. They are a new generation of environmental protection materials. They are moisture-proof, breathable, flexible, light, non-combustion-supporting, easy to decompose, non-toxic, non-irritating and colorful.
3. Twill: various twill fabrics are used to make the surface of the fabric show oblique lines formed by warp or weft floating lines. Twill is a medium thickness denim, there are two kinds of thick, fine (20-40 pieces), are using 2/1 left twill organization, texture than plain cloth slightly thick soft, front lines clear.
4, rabbit wool: rabbit wool fiber scales are relatively smooth. Soft sex, hygroscopicity, do not have a ball, also be rabbit flannelette material underwear rises in recent years one of main reasons. Rabbit hair belongs to amino acid protein fiber, which is similar to the composition and structure of human skin, has a good skin-friendly feeling, and has the function of maintaining animal life.
5, crystal super soft wool surface to be more delicate, feel better. High density between fibers, strong three-dimensional sense of hair, beautiful appearance, compared with the original super soft, glossiness is higher, feel more soft and thick, fine texture, environmental protection and so on.
6, wool fabrics have a velveteen, velvet, velvet, cluster flannelette, polyester silk fabrics flannelette flannelette, knitted fabrics, cotton fabrics flannelette velvet, velvet fabrics, warp knitted fabrics flannelette (new varieties, with 50 d polyester yarn and polyester FDY such DTY75D / 36 f/strong mesh as raw material, using the knitting chain structure, fabrics successively after scouring desizing, finalize the design, dyeing, softening, stenter stereotypes, such as deep processing), hole ring flannelette, super soft plush cloth (the latest varieties), short plush cloth (the latest varieties)

Our company is equipped with advanced production machines and complete inspection machines to improve production efficiency and quality. Our aim is to provide the best service, the fastest delivery time, high quality products and low price quotation to all customers.
The Dance Props
The Dance Props,Dance Flash Props,Festival Dancing Props,Dance Party Props
SHEN ZHEN HAO XIAN LONG TECHNOLGY.CO.,LTD , https://www.haoxianlongtoys.com